Configuring an External Keycloak
SEAL Systems products use Keycloak as standard identity provider. Keycloak contains various client configurations for PLOSSYS 5 and SEAL Operator/SEAL Print Client.
If you prefer to use an external Keycloak, you have to configure your external Keycloak for working with SEAL Systems products.
Configuring Your External Keycloak
-
Create an new realm by pointing with the mouse to the
Masterrealm on the left upper corner of the window and then click onAdd realm.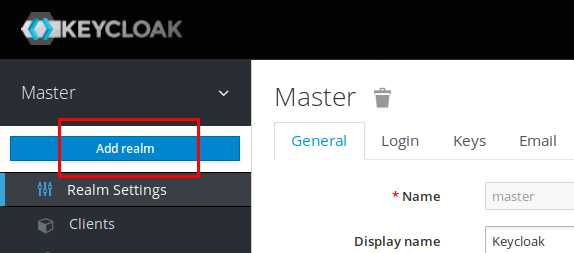
-
In the displayed dialog, enter
SEALas realm name and confirm withCreate. -
Get a private key/certificate pair from your system administration and add it to the created
SEALrealm. For this, open theRealm Settingson the left side of the window and in theKeys, tab selectProvider.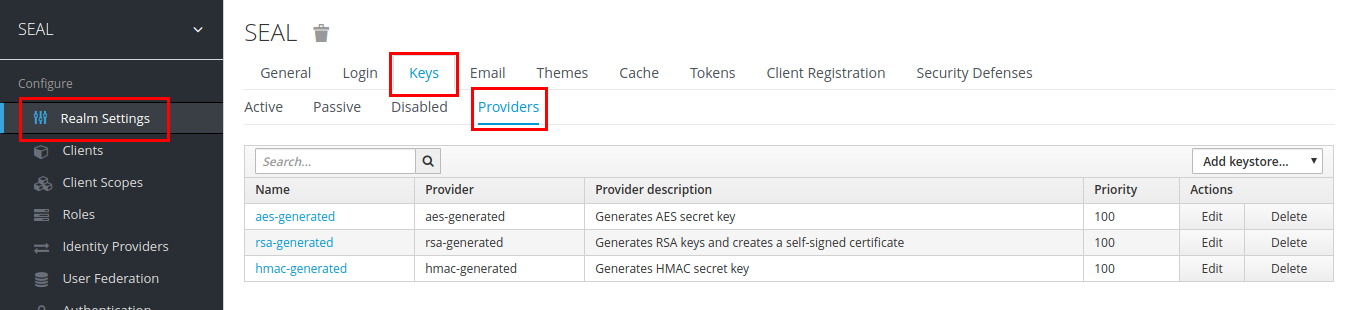
-
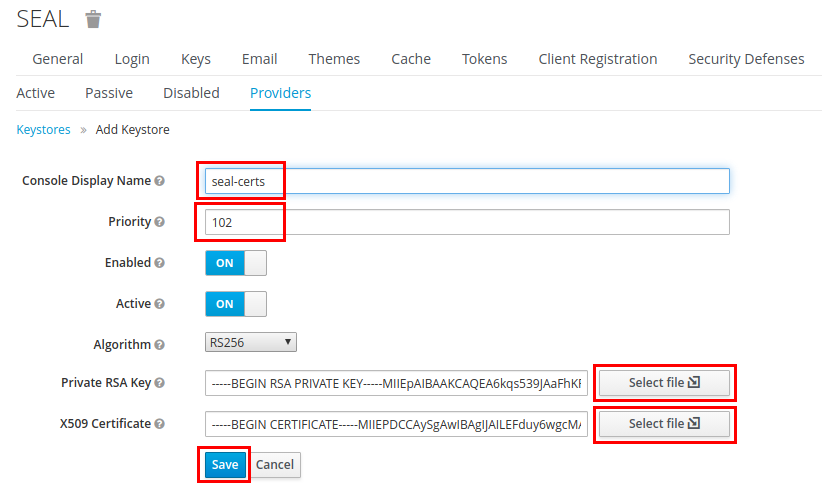
Add a new key/certificate pair by clicking on
Add keystoreon the left above the provider list and selectrsaas keystore type. -
Add the name of the provider, select a priority higher than 100 and upload both, key and certificate file.
-
Select the
Clientsmenu item and configure the clients for the createdSEALrealm in the identity provider. Finally, it has to look like this: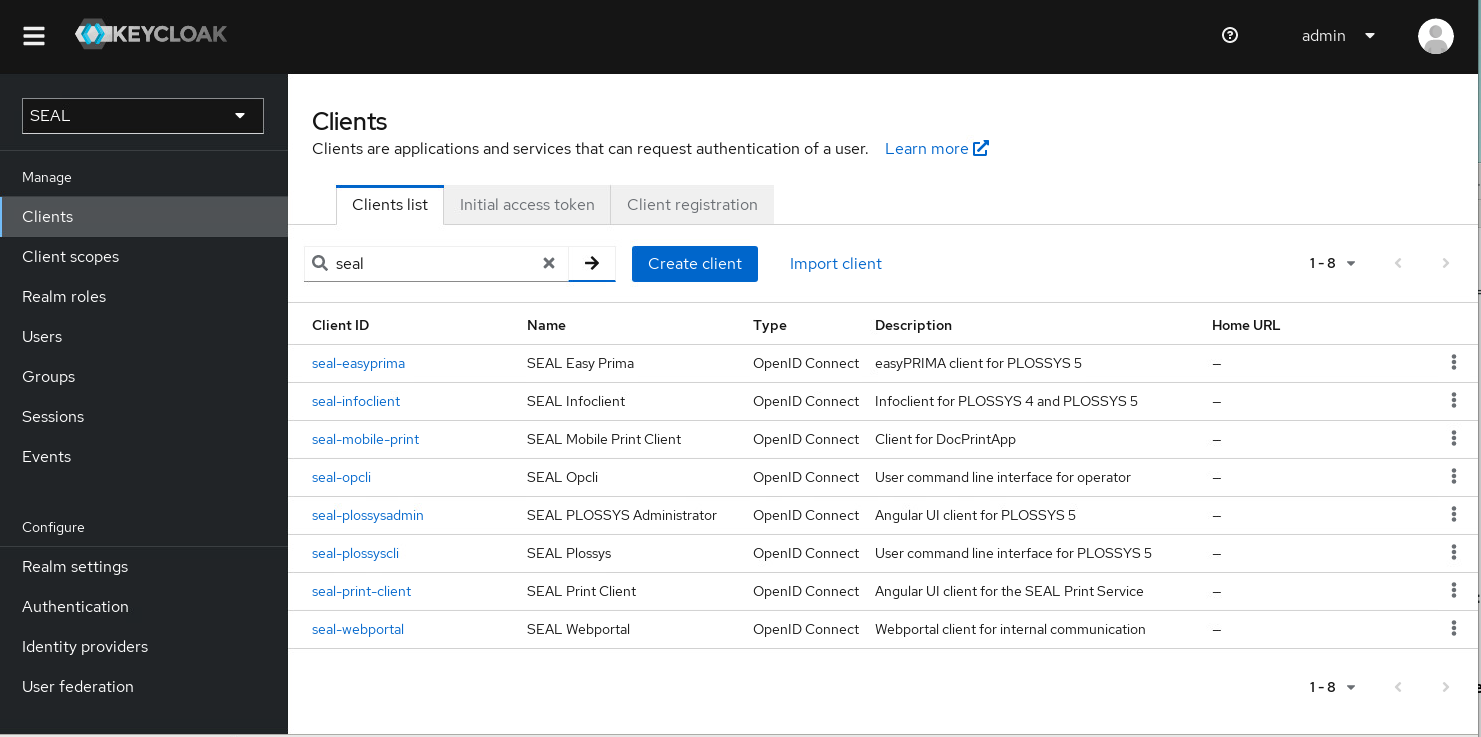
-
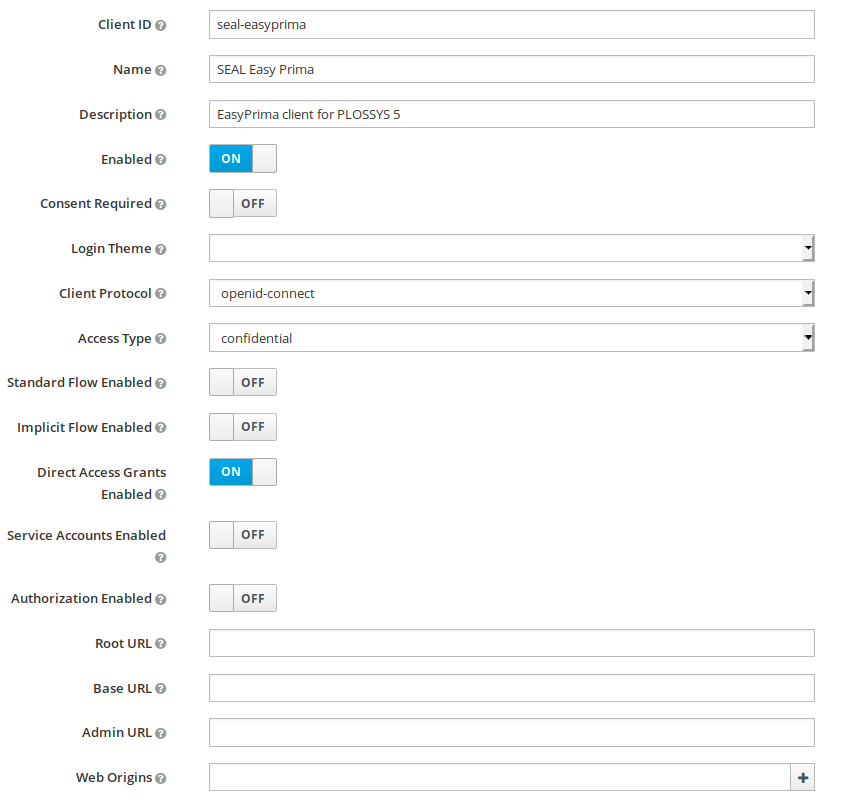
SEAL easyPRIMA:
-
Create an easyPRIMA client entry by clicking on
Createin the right upper corner of the client list and enterseal-easyprimaas client id. Confirm withSave. -
Enter the client configuration data as shown in the picture below:
-
-
PLOSSYS Administrator:
-
Create a PLOSSYS Administrator client entry by clicking on
Createin the right upper corner of the client list and enterseal-plossysadminas client id. Confirm withSave. -
Enter the client configuration data as shown in the picture below, but replace
localhostby the real PLOSSYS 5 host name.
-
-
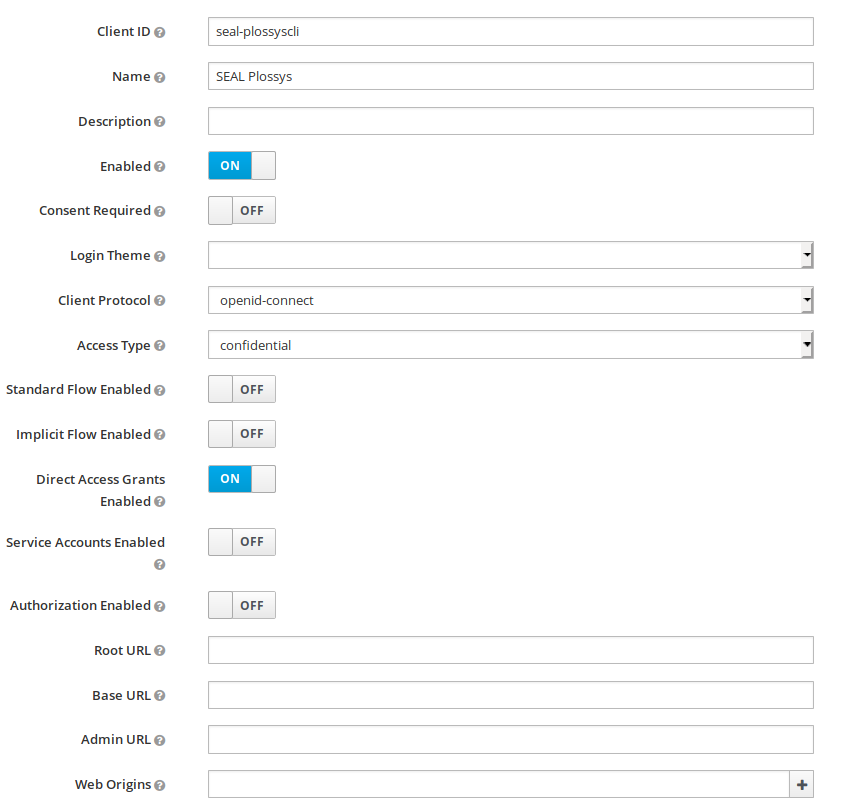
PLOSSYS CLI:
-
Create a PLOSSYS CLI entry by clicking on
Createin the right upper corner of the client list and enterseal-plossysclias client id. Confirm withSave. -
Enter the client configuration data as shown in the picture below:
-
-
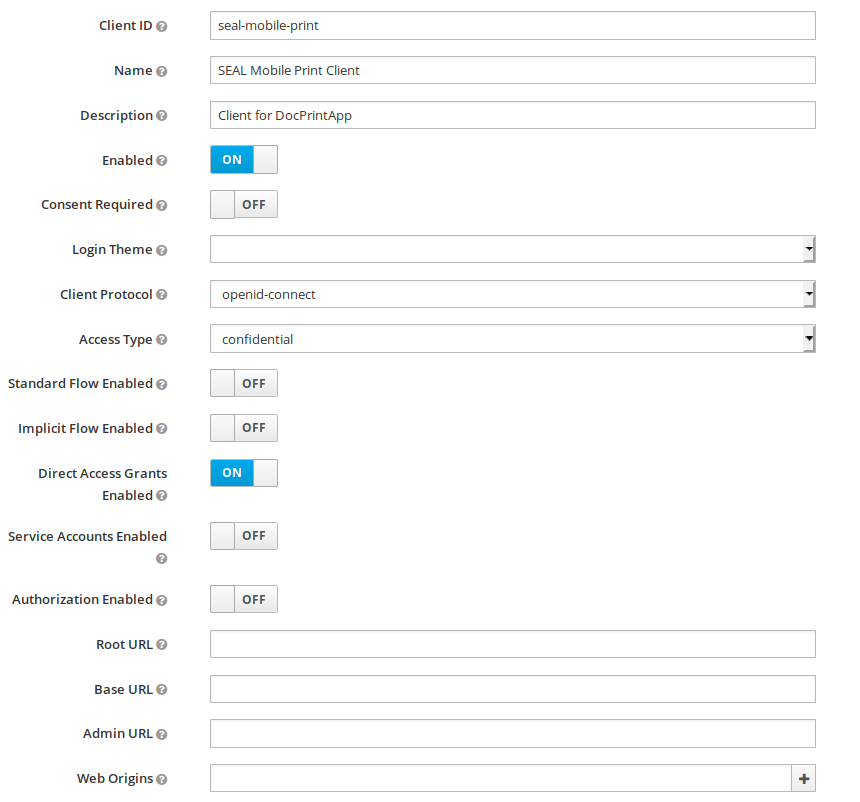
PLOSSYS DocPrint:
-
Create a PLOSSYS DocPrint client entry by clicking on
Createin the right upper corner of the client list and enterseal-mobile-printas client id. Confirm withSave. -
Enter the client configuration data as shown in the picture below:
-
-
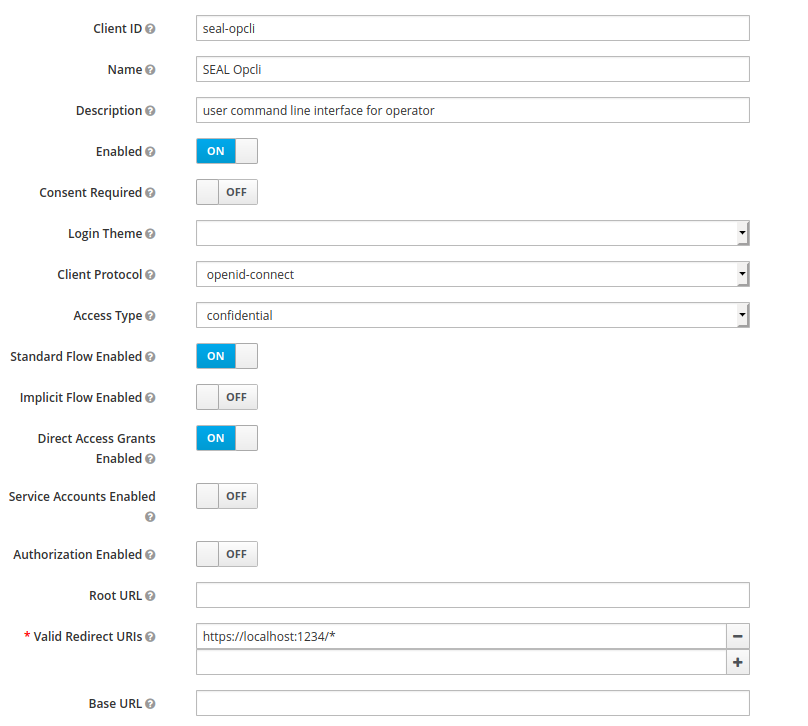
SEAL OP-CLI:
-
Create a SEAL OP-CLI client entry by clicking on
Createin the right upper corner of the client list and enterseal-opclias client id. Confirm withSave. -
Enter the client configuration data as shown in the picture below:
-
-
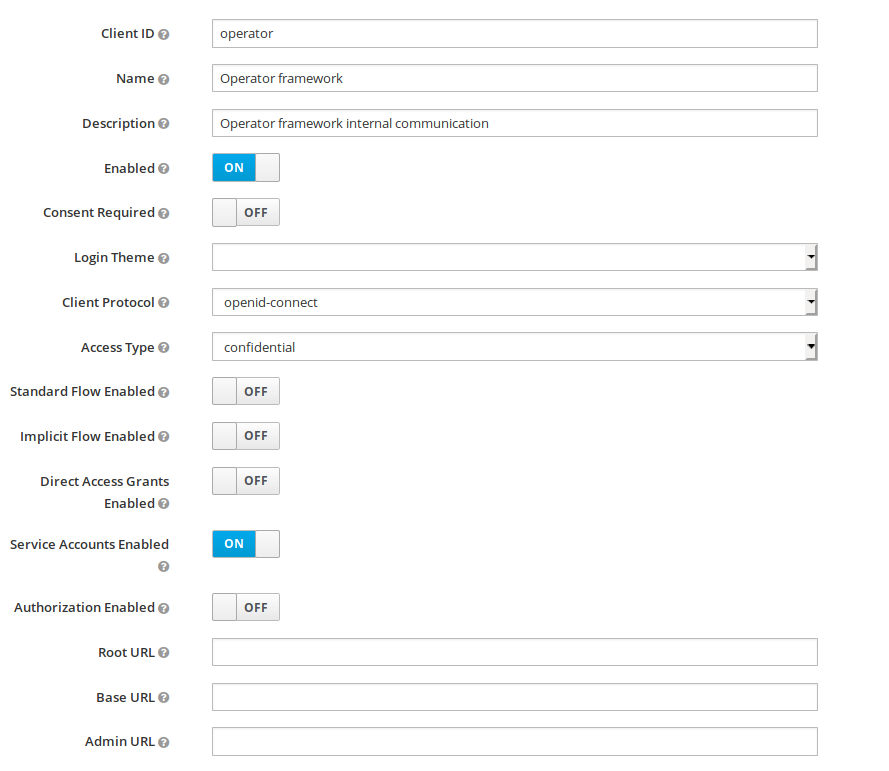
SEAL Operator:
-
Create an Operator client entry by clicking on
Createin the right upper corner of the client list and enteroperatoras client id. Confirm withSave. -
Enter the client configuration data as shown in the picture below:
-
-
SEAL Operator/SEAL Print Client:
-
Create a SEAL Operator/SEAL Print Client entry by clicking on
Createin the right upper corner of the client list and enterseal-print-clientas client id. Confirm withSave. -
Enter the client configuration data as shown in the picture below, but replace
localhostby the real SEAL Operator/SEAL Print Client host name: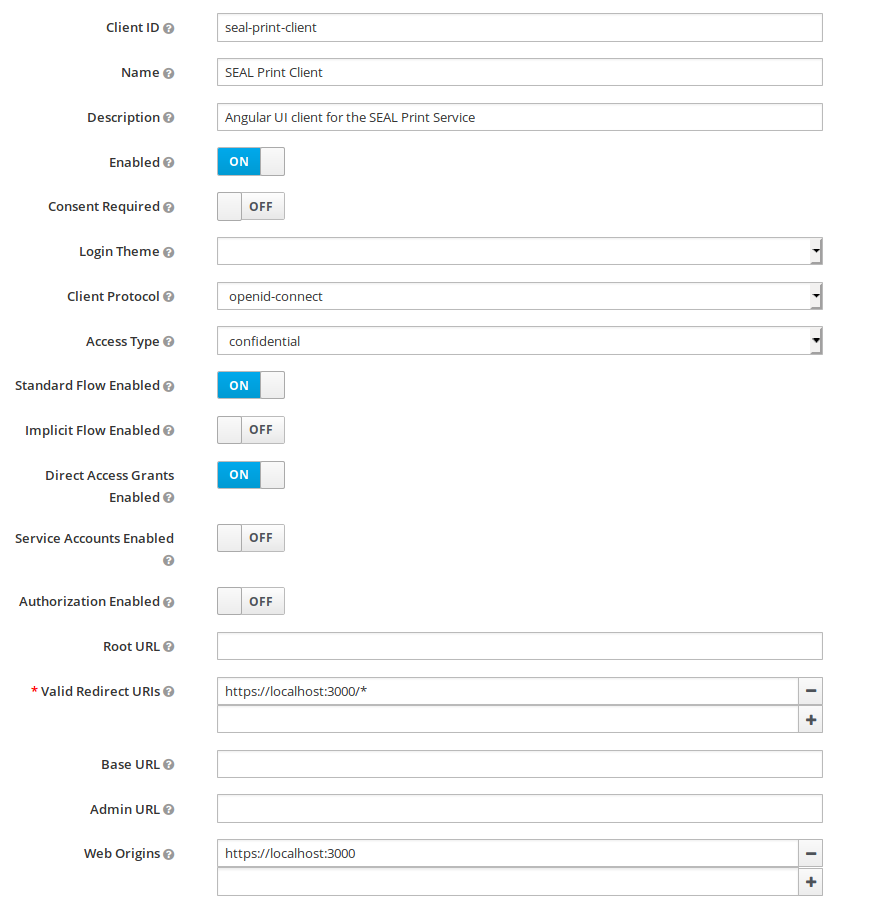
-
-
-
Provide the following data to set up SEAL Operator/SEAL Print Client and PLOSSYS 5 clients:
- issuer url
- issuer name
- all client id's
- all client secrets
Usually this part of the configuration is done in the form of environment variables on the client side. You will find an example in Configuring Other Identity Providers.